Back in December I noticed that my tie collection was getting a wee-bit out of control. I needed to make something out of ties before I ran out of places to store them. Since it was Christmas, I decided to make a tree skirt out of neckties. It was a good project, all done by good ol'fashion trial and error.
I shared my project with a few classmates and faculty members at the
college I attended, and one person expressed interest in me making one
for her. She came bearing a bag full of ties!
HUZZAH!
Flash forward 6 months...I'm not good with directions. I mostly, like I said, do everything by trial and error. But I'll try to replicate my goings-on so you can follow what I did.
I cut 36 ties to a length of 24" (the big fat ends) and saved the skinny ends... I arranged them into 6 groups of 6, then used a zigzag stitch to sew the 6 groups of 6 together. There are 5 ties that I cut to the length of 14". You know those skinny ends I saved? I zigzag stitched each of the 5 fat 14 inchers between two of of the skinny ends. Here comes the hard part.... assembling errrthing.
I arranged the 6 panels into a circle, and then placed those 5 smaller panels in between. Zigzag stitch the
shiiiiiiiizzzzz outta that circle to form... you know... a tree skirt.
My gosh, even I'm not following how I did this.
Then I cut out 2 yards of black felt and stitched it into a big ol' circle. Then sewed
that circle to the tie circle. Beeeelieeeeeve me... there's
A LOT of fabric, and it takes
A LOT of muscle to get this shizz through a sewing machine in one piece. If you're trying this one, do yourself a favor and get yo'self some extra needles for your machine. You'll need them! But the payoff is awesome-sauce.
Truth is, I could have taken better pictures. I kept forgetting. That's the way it is, dangit.

 A friend of mine asked me to make two t-shirt quilts for her sons. One is in a Phillies motif, the other is Flyers. Quilts are fun to do, but they can be difficult if you don't choose the right materials. T-shirts: You cannot just sew them together. You have to use fusible interfacing to stabilize the stretchiness... if you don't, you'll end up with a bunch of stretched out-crazy looking t-shirts that you'll want to burn instead of cuddling up with.
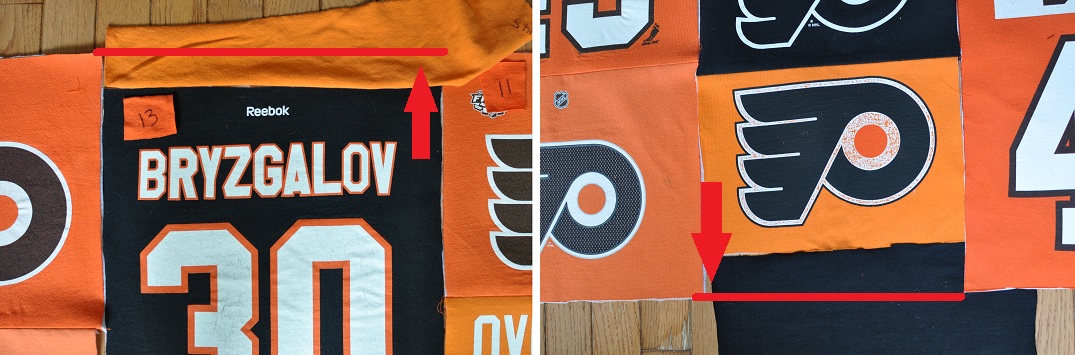
 The first thing you need to do with t-shirts is cut out the BS. So, that means cutting out the front of the shirt and the back, and tossing away the sleeves and seams. Then you have to measure the width of the actual design on the t-shirt... This will help you organize the shirts into columns. For the two quilts that I'm doing, each one has column widths of 11", 12", 13" and 14". Once you organize everything into columns, you have to determine what length each shirt will be... then you're ready to cut everything out. Straight edges are keeeeeeeeeey in this step! If you don't have a perfect right angle, your quilt will be wonky. Keep some of the excess shirt scraps... you might need some later on.
  Once everything is cut out, set yourself up in front of the TV and pour yourself a glass (or two) of wine, because it's time to iron on the fusible interfacing. Like I said, it'll keep the fabric stabilized when you sew everything together! Then the fun begins... arrange allllll yo' shirts in their columns, and start sewing errrything together! Be sure to always press the seams open with a hot iron, this will ensure that the quilt lays flat n' lovely.