A friend of mine asked me to make two t-shirt quilts for her sons. One is in a Phillies motif, the other is Flyers. Quilts are fun to do, but they can be difficult if you don't choose the right materials. T-shirts: You
cannot just sew them together. You have to use fusible interfacing to stabilize the stretchiness... if you don't, you'll end up with a bunch of stretched out-crazy looking t-shirts that you'll want to burn instead of cuddling up with.

The first thing you need to do with t-shirts is cut out the BS. So, that means cutting out the front of the shirt and the back, and tossing away the sleeves and seams. Then you have to measure the width of the actual design on the t-shirt... This will help you organize the shirts into columns. For the two quilts that I'm doing, each one has column widths of 11", 12", 13" and 14". Once you organize everything into columns, you have to determine what length each shirt will be... then you're ready to cut everything out. Straight edges
are keeeeeeeeeey in this step! If you don't have a perfect right angle, your quilt will be wonky. Keep some of the excess shirt scraps... you might need some later on.

Once everything is cut out, set yourself up in front of the TV and pour yourself a glass (or two) of wine, because it's time to iron on the fusible interfacing. Like I said, it'll keep the fabric stabilized when you sew everything together! Then the fun begins... arrange allllll yo' shirts in their columns, and start sewing errrything together! Be sure to always press the seams open with a hot iron, this will ensure that the quilt lays flat n' lovely.
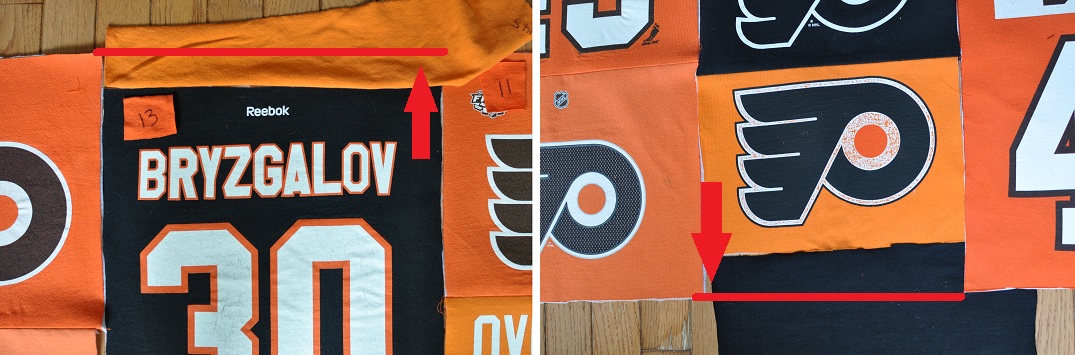
Remember some of those scraps you saved? If your quilt is too short in some areas, cut out scraps in that size and fuse the interfacing to it: Then stitch to the quilt so it's the correct length!
NEXT UP! Cutting out the backing fabric, choosing a batting and assembling everything together.

 A friend of mine asked me to make two t-shirt quilts for her sons. One is in a Phillies motif, the other is Flyers. Quilts are fun to do, but they can be difficult if you don't choose the right materials. T-shirts: You cannot just sew them together. You have to use fusible interfacing to stabilize the stretchiness... if you don't, you'll end up with a bunch of stretched out-crazy looking t-shirts that you'll want to burn instead of cuddling up with.
 The first thing you need to do with t-shirts is cut out the BS. So, that means cutting out the front of the shirt and the back, and tossing away the sleeves and seams. Then you have to measure the width of the actual design on the t-shirt... This will help you organize the shirts into columns. For the two quilts that I'm doing, each one has column widths of 11", 12", 13" and 14". Once you organize everything into columns, you have to determine what length each shirt will be... then you're ready to cut everything out. Straight edges are keeeeeeeeeey in this step! If you don't have a perfect right angle, your quilt will be wonky. Keep some of the excess shirt scraps... you might need some later on.
  Once everything is cut out, set yourself up in front of the TV and pour yourself a glass (or two) of wine, because it's time to iron on the fusible interfacing. Like I said, it'll keep the fabric stabilized when you sew everything together! Then the fun begins... arrange allllll yo' shirts in their columns, and start sewing errrything together! Be sure to always press the seams open with a hot iron, this will ensure that the quilt lays flat n' lovely.