2.27.2013

culmination

It seriously took me a couple days to put my thoughts together to write this post. You could say this post entitled culmination is the culmination of thoughts, but it's mostly about the culmination of one of my most difficult projects. Actually, it's all about the culmination of my most difficult project. I never thought I could use that word 4 TIMES in the same post!

I FINISHED THE QUILT.
That's right... The quilt is finished! Der Quilt ist fertig! El quilt está terminado!

As you might recall, in my last quilt post I noted that I needed to hand stitch the open seam closed to the backing fabric and officially 'sign' the quilt. I began by pinning the binding in place with my super long 1-1/2" flat quilting pins. Then, since I'm not a very good hand-stitcher, I thought it would be wise to do some research on which stitch would be best to finish the open seam. (PS: Typing which stitch would be best is just as hard as saying it three times fast.) I ended up choosing the blind stitch thanks to the awesome instructions and description on this blog called Quilting in the Rain. <--- If you have a couple of minutes, please check out her blog: It's unbelievable, plus it's so bright and cheery!

It look me a little while to find my stride when it came to blind stitching, but over the course of a week, I diligently sewed the night away. I pricked my fingers.. and legs... and arms a couple of times, thanks to those super long 1-1/2" quilting pins. But with every stitch, I knew that I was getting closer and closer to finishing my first quilt.

On Saturday night, I sat down on the couch and began stitching away, knowing that within a couple of hours my project would be finished. I thought about all the work that went into making it. I thought each strip of fabric that I pieced together, sewing them onto the muslin blocks, pressing them flat and fashioning them all into rows and columns. I thought about how I almost convinced myself to send it out to get finished, and the moment it dawned on me to just give it my best shot. I thought about all of my family, and the signatures that they added to different blocks of fabric. And then I thought about the one signature that was missing. Adelaide Ruess. 

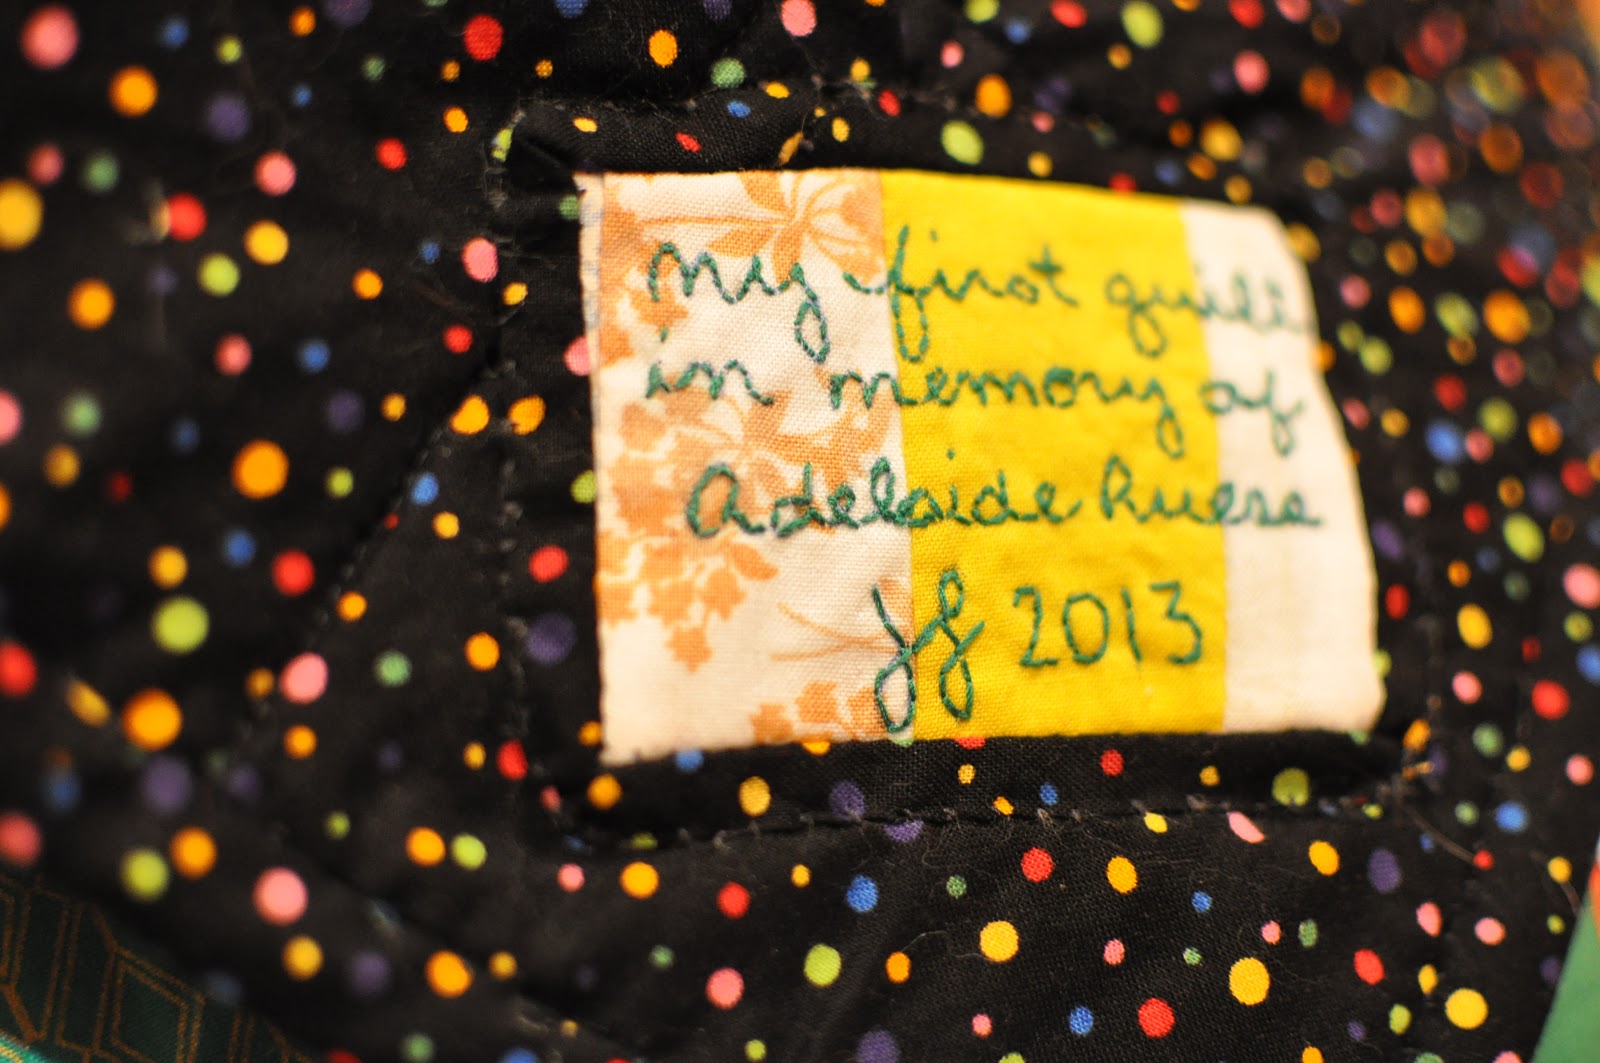
So, I added it myself. 
I was emotionally and physically exhausted after finishing it, and ended up falling asleep on the couch wrapped up in my new quilt. I was so happy that I accomplished my goal of making a quilt, but I was also quite sad. It's cruel to me that I can't show it to Audi. But in my heart, somehow I think that she has seen it. I hope she's as proud of me as I am of myself.

If you'd like to look back at all of the quilt related posts, you can find them right here.

2.19.2013

obligatory wedding craft DIY post part 2

So on to the place cards. I accidentally purchased ones that are more like business cards, and less like the tenty-ones that I thought I was buying. My bad. I wasn't going to return them back to Vistaprint, so I had to find a solution to my little problem.

 
So I did what anyone else would have done: I Google'd it! I typed in place card holder and the one solution that caught my eye was a holder made from a wine bottle cork. Can you believe though, that some people on Etsy are selling them for upwards of $1.00 each? You and I both know that's a whole bunch of bologna. I can do that for way, way less. Actually... maybe I can ask Lou to do it for me since he's handy with tools and loves spending time in the garage...

BINGO.

I found some pretty cool online tutorials, but I thought I'd share my own below.

Wine Cork Place Card Holders
1. Buy 100 bottles of wine (remember, you'll need one bottle per guest!)
2. Open and drink 100 bottles of wine. Save the corks if you're not too drunk to remember this step. Keep drinking until you have enough corks!
3. Take 4 weeks to sober up, and/or be released from the hospital.

Or you can...
1. Go on EBay and purchase a bulk bag of 100 corks for $10.00.

I wouldn't recommend the first set of instructions unless you want to spend a lot of money or become a raging alcoholic.


Now, take your corks one at a time, and set them up in a vice-grip if you have one. It is much easier than trying to hold all the corks while trying to cut them. Cut off the bottom 1/3 of the cork and discard. Run a piece of medium grit sand paper over the cut surface. Finally, make a slit in the top of the cork deep enough for you to insert your place card.

VOILA! YUR DUN. And all for $10! With that extra $90, you can go buy many cases of vino from Total Wine!


2.18.2013

obligatory wedding craft DIY post, part 1

Yes, I know I said that this wasn't going to become a wedding blog, and I promise that it still won't. I'm not going to get all omg look at these wedding favors (ERMAHGERD LERK ERT THERS WERDIN FERVERS!!) up in here. But there have been so many crafts that we're doing for WDay, that it would be impossible to ignore all the fun we've been having. We're literally crafting our poof balls off.

You may remember a while back I was making a ton of yarn poof-ball flowers in anticipation of using them for as my wedding flower boquet. Well... the idea was ultimately vetoed, so I decided to just use them as decoration instead. Luckily, back in November whilst on a Pocono hike, I found A TON of discarded bottles in the woods. There must have been hundreds of them. So, like any good  hoarder environmental enthusiast, I loaded up those gross, mud caked bottles into the car and carted them home. After giving them a good soaking and shining them up with Windex, they looked like brand new. AAAAAAAAAAND I had the perfect vessels for my poof flowers! Some bottles still had gook and goobers inside, so I cleverly wrapped twine around those sections, disguising the grossness.

That was my Saturday project. I had to make a couple more poof flowers, so it took me a little while to get all 15 of the bottles done.

On Sunday, I made the 'guest book'. And by 'guest book' I mean, matted picture frame. When it comes to guest books, there's about a zero percent chance that I'll ever sit down to peruse a guest book. We framed up an 8x10 picture that we took in front of the Golden Gate Bridge with a 16x20 mat. I used some old Scrabble letters, some wire and decorative beads to label it as the 'guest book'. Not too bad for a couple hours of crafty work! Tomorrow I'll post about the place card dilemma and solution.

2.08.2013

ERM ERLMAHST FERNERSHERD MAH QERLT

Translation: I'm almost finished my quilt! Side note here: Since my purchase of my ERMAGERD! embroidery from Etsy, I've been kinda obsessed with TERLKIN LERK THERS. I literally can't help it since it's one of the only things keeping me in the sane department. FERGERV MAH.

SO! I've been one busy beaver the past couple of weeks... that sounded odd, but I'm going to keep it in the blog anyways because I can't think of anything better to say. Here's some good news. I finished quilting the rows and columns of my quilt! As you might remember I was in the midst of machine quilting about three weeks ago. Luckily, I finished and it went as well as I expected it to. Holla!

My next set of instructions kinda baffled me. I had to cut a 36" square of the backer fabric, cut it in a diagonal, restitch it together, press it flat, measure bands 2.5" wide, match up the lines of the bands, sew the piece into a tube, then cut one continuous band out of the fabric. WHERT DA FERCK you say? Yes, indeed. It took me a long time to be confident enough in myself to even attempt it. But, I took my time, and when I was I finished, I had a 2.5" band of fabric that was about 354" long. You read that right. Three hundred and fifty-four inches long. THRER HERNDRERD ERND FERFTERFER ERNCHERS LERNG.

From there, I pressed the band lengthwise (wrong sides together) and wrapped it neatly around a roll of duct tape... just so it wouldn't get all un-pressed and funky. Yesterday, I grew a set and said "You know what?! I'm going to attach the binding tonight!!" WHY NOT?! It's not like I have anything else going on! SARCASM TO THE EXTREME.

So. I went for it. And by 11:30pm, I had the band of binding machine stitched around the entire perimeter of the quilt. I cut off the excess fabric and pressed the seams open. The only thing left for me to do is hand stitch the open seam closed to the backing fabric, and to attach a piece of fabric with my signature on it. Ah bliss. I can't believe it's almost done!