9.22.2015

a new... something

Heads up: I've had wine! 

After I finished up the t-shirt quilts, I decided that it was finally time to focus in on one for myself. I found this AMAZING but complicated pattern in a quilting magazine that I purchased (YES, I buy quilting magazines. Thug life.) but there was a problem: It was a pattern for a twin quilt. I don't need no stinkin twin quilt. Another problem: I already had way too many scraps left over from my first quilt, I thought it'd be a waste not to use them... but how?

So... I just started sewing. I took out my box of scraps and basically just started machine stitching them together. Since all of the scraps were tapered, they started looking like colorful fans. I had another interesting thought. What if I sewed these fans into a wave? Then what if the wave became a column? And what if I sewed these columns together to form a sort-of-painting

 So many questions! One final product,  though.Once I finished sewing the columns together, I quilted it with gold thread. Then stapled the s*** outta it onto a canvas. Soon I'm going to frame it. SOON... SOON.


9.09.2015

phl -> atl

Recently a good friend of mine departed the Philadelphia area to start life anew with his beautiful fiancé in Atlanta. As sad as I am when friends leave the area, it is always exciting knowing that they are literally embarking on a new phase of life. I always wanted the balls to pick up and move. I mean... I'm only an hour away from home home, but it's not like I moved to an area that's easier to get to by plane then by driving. How cool would it be one day to be like I'M SELLING EVERYTHING I HAVE AND MOVING TO A DAKOTA OR IDAHO BECAUSE WHY NOT.

Anywho, I wanted to give them a going away present. I failed miserably getting it to them on time. The thing was... I couldn't figure out what the f*** to do. He sent me some photos of things that they liked. Which I guess I pretty much ignored in the end. Sorry about that John.... just realized that.

I was like, if I were them, what would I want to remind me of home? That it's not too far away? So here's what I came up with: A painting that you could flip.

I started with blocks of color, which I haven't done in years. Truth is, my hands aren't as steady as they use to be, so some lines are wobbly. <--- that could be symbolic, like "just as these lines aren't straight, neither is the road in life... HA!

Then I decided to paint the skylines of Philadelphia and Atlanta. The area in between was a little harder. I originally wanted to put a couple walking hand-in-hand to both skylines, but there wasn't enough space. So I decided to paint a PHL-> and an ATL->. One day, if they're back in Philadelphia, they can always remember the home they made in a new city. I'm happy with the way it came out, and I'm hoping that it reminds my good friends that no matter how far, home isn't that far.
NOW I JUST HAVE TO FIGURE OUT HOW TO GET IT TO THEM.

t-shirt quilts, part DUEX

From where we last left off, I had finished stitching together all of the t-shirts into two lovely quilt tops. I hate to say but I barely documented part DUEX in pictures. I was sew busy. Heh. … ok, lame joke.
SO! Choosing a batting… You want to be sure that you find one that matches the project that you’re working on. A flatter, less puffy batting is great for quilts that you want to be… well, flat and less puffy. Especially ones with intricate designs. I chose a really nice medium puff batting, because of two reasons. 1) The t-shirts and backing material had a little stretch to them. The puffiness of the batting would help this irregularity when I stitched it together. 2) WHO DOESN’T LIKE PUFFY QUILTS? You? Well, you're un-American.
PUFFY!
Luckily, the backing fabrics that I chose for both quilts were W-I-D-E as H-E-L-L. So I didn’t need to stitch two pieces of the backing together. To cut the backing and the batting to size, here is the easiest thing to do: Find a floor. Put the backing fabric on the floor, and secure it with masking tape so it stays put. Next, lay the batting on top, followed by the quilt top. Secure all that shiz together with long quilting pins or safety pins. (I use quilting pins... I have no tolerance for safety pins, plus they're too bulky.) Lastly, cut the backing and batting about 6” bigger than the quilt top. This gives you a safe zone in case you f*** up.

Here’s the tricky and painful part. You will now stick yourself with so many pins. SO. MANY. And not just on your hands. The quilt literally lays on your lap while you’re trying to machine stitch it. It’s like trying to lay down with a needle filled blanket. Very ouchI start by machine stitching the long columns of the quilt. Then, stitch the rows. Since the rows are irregular, I usually will pick up the needle and foot, move to the beginning of the next row, and sew on. 

turns out, it's a real thing.
Next comes the binding… Binding is tricky, but once you get the hang of it, it’s… just less tricky I guess. I cut a continuous piece of fabric 2.25” wide, press it in half, then sew the raw edges to the edge of the quilt top. You then cut off any excess batting and backing fabric…. Then you have to hand stitch everything shut. It takes a LONG TIME. And your hands will not thank you. But it’s worth it, especially with wine that you CANNOT SPILL ON THE QUILT. If you're a spiller, then put your wine in one of those toddler sippy cups.

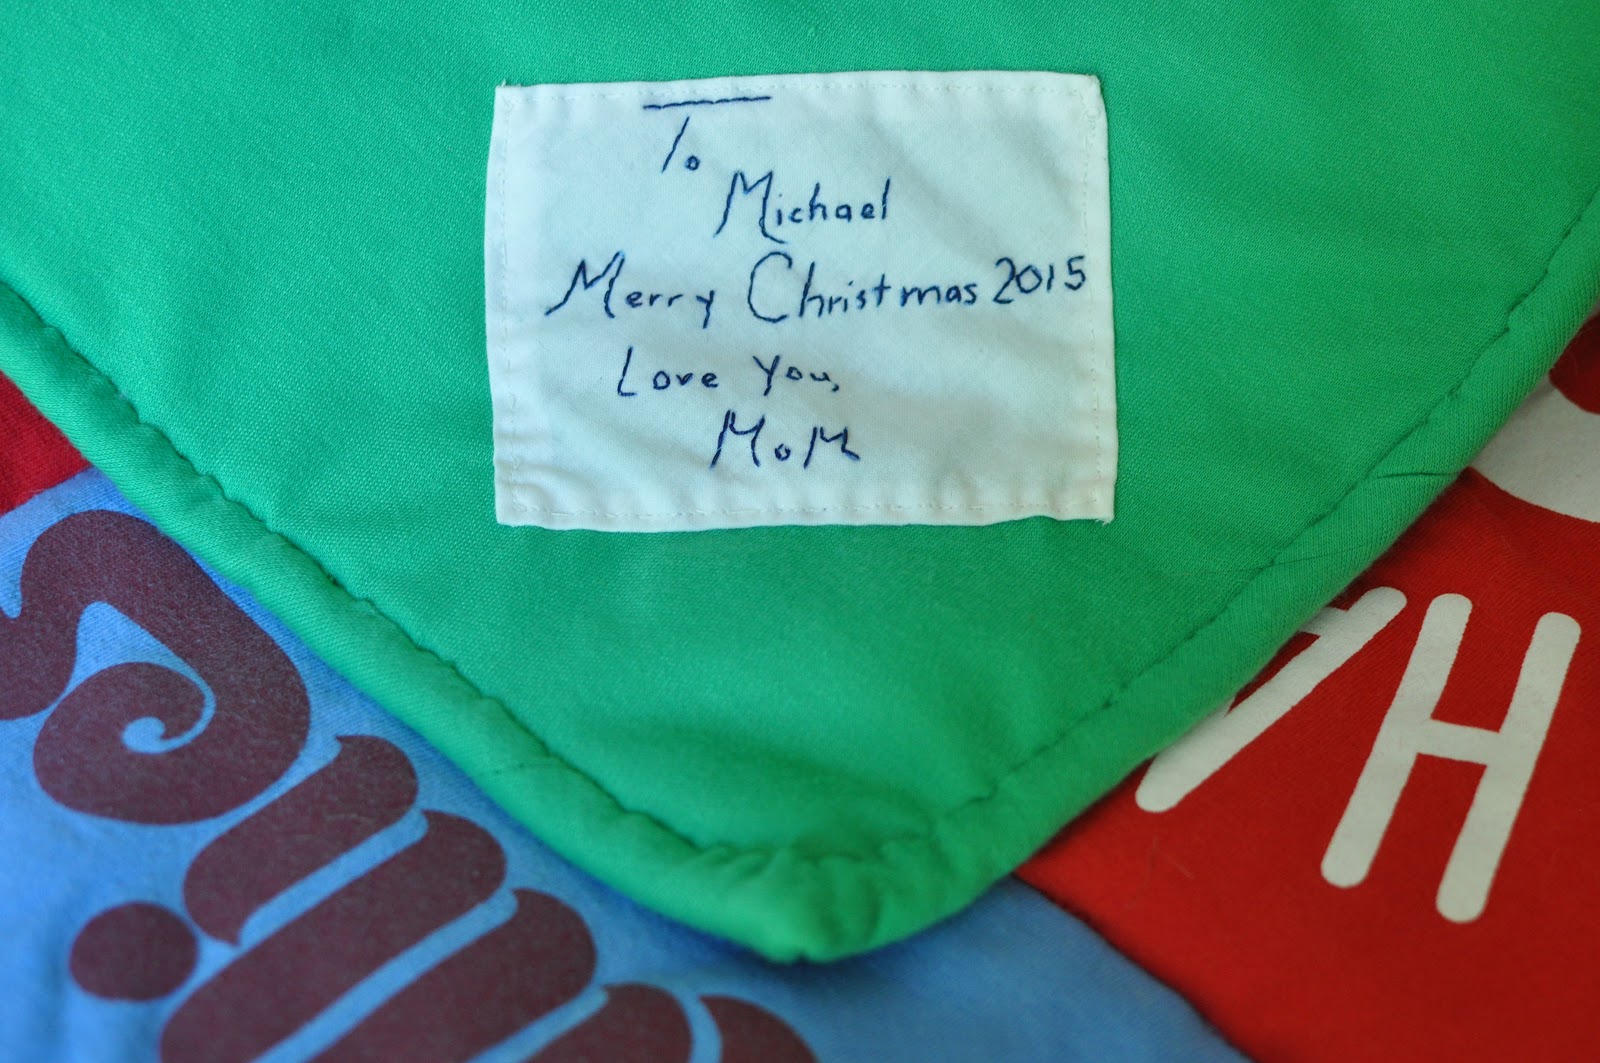
To add a personal touch, I asked my friend to send me (in her writing) a message for each of the quilts. I printed it out, then used graphite paper to transfer her message to white fabric. I then hand stitched her message and sewed this on to each quilt. So that’s it! Two quilts finished. I hope they surround their new owners in years of love and comfort. It was such a cool project, I’d be totally willing to do more of them in the future!!! 
 

7.18.2015

t-shirt quilts, part 1

A friend of mine asked me to make two t-shirt quilts for her sons. One is in a Phillies motif, the other is Flyers. Quilts are fun to do, but they can be difficult if you don't choose the right materials. T-shirts: You cannot just sew them together. You have to use fusible interfacing to stabilize the stretchiness... if you don't, you'll end up with a bunch of stretched out-crazy looking t-shirts that you'll want to burn instead of cuddling up with.

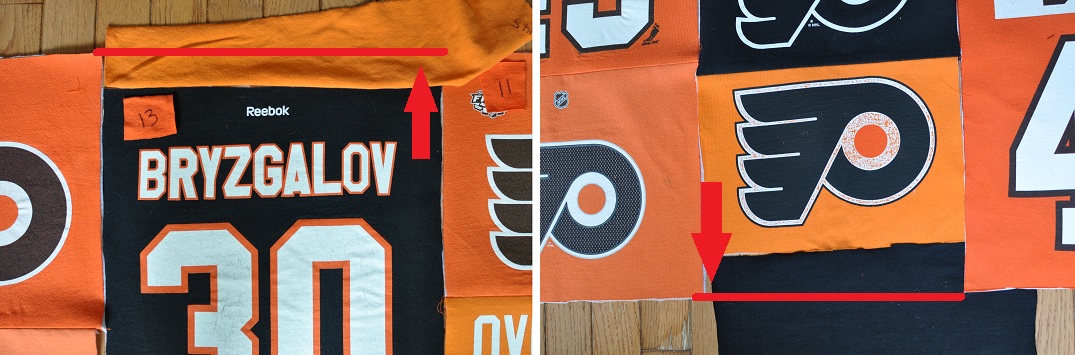
The first thing you need to do with t-shirts is cut out the BS. So, that means cutting out the front of the shirt and the back, and tossing away the sleeves and seams. Then you have to measure the width of the actual design on the t-shirt... This will help you organize the shirts into columns. For the two quilts that I'm doing, each one has column widths of 11", 12", 13" and 14". Once you organize everything into columns, you have to determine what length each shirt will be... then you're ready to cut everything out. Straight edges are keeeeeeeeeey in this step! If you don't have a perfect right angle, your quilt will be wonky. Keep some of the excess shirt scraps... you might need some later on.

Once everything is cut out, set yourself up in front of the TV and pour yourself a glass (or two) of wine, because it's time to iron on the fusible interfacing. Like I said, it'll keep the fabric stabilized when you sew everything together! Then the fun begins... arrange allllll yo' shirts in their columns, and start sewing errrything together! Be sure to always press the seams open with a hot iron, this will ensure that the quilt lays flat n' lovely.
Remember some of those scraps you saved? If your quilt is too short in some areas, cut out scraps in that size and fuse the interfacing to it: Then stitch to the quilt so it's the correct length!
NEXT UP! Cutting out the backing fabric, choosing a batting and assembling everything together.

7.15.2015

necktie tree skirt

Back in December I noticed that my tie collection was getting a wee-bit out of control. I needed to make something out of ties before I ran out of places to store them. Since it was Christmas, I decided to make a tree skirt out of neckties. It was a good project, all done by good ol'fashion trial and error. 
I shared my project with a few classmates and faculty members at the college I attended, and one person expressed interest in me making one for her. She came bearing a bag full of ties! HUZZAH!

Flash forward 6 months...I'm not good with directions. I mostly, like I said, do everything by trial and error. But I'll try to replicate my goings-on so you can follow what I did. 

I cut 36 ties to a length of 24" (the big fat ends) and saved the skinny ends... I arranged them into 6 groups of 6, then used a zigzag stitch to sew the 6 groups of 6 together. There are 5 ties that I cut to the length of 14". You know those skinny ends I saved? I zigzag stitched each of the 5 fat 14 inchers between two of of the skinny ends. Here comes the hard part.... assembling errrthing.

I arranged the 6 panels into a circle, and then placed those 5 smaller panels in between. Zigzag stitch the shiiiiiiiizzzzz outta that circle to form... you know... a tree skirt.

My gosh, even I'm not following how I did this.

Then I cut out 2 yards of black felt and stitched it into a big ol' circle. Then sewed that circle to the tie circle. Beeeelieeeeeve me... there's A LOT of fabric, and it takes A LOT of muscle to get this shizz through a sewing machine in one piece. If you're trying this one, do yourself a favor and get yo'self some extra needles for your machine. You'll need them! But the payoff is awesome-sauce.
Truth is, I could have taken better pictures. I kept forgetting. That's the way it is, dangit.

6.18.2015

bears, squares, monty python reference.

So everyone knows I'm relentless artsy nutcase, and that I'm forever up for an artsy challenge. Harcum, my alma mater, is having a yearlong Centennial Art Celebration that encourages students, faculty, and staff to contribute art that can be auctioned off for their Centennial Scholarship Fund. I did three projects for the cause. Why THREE? Because THREE shall be the number thou shall count, and the number of the counting shall be THREE. Four, thou shall not count, neither count thou two, excepting that thou then proceed to THREE.

... That really wasn't the reason why, I just happened to have enough momentum to do THREE. The first project I did was for Bears and Squares. Basically, you get a 10x10" canvas and center your creation around the theme possibilities. Naturally, I started cutting out skeletons and brains from anatomy texts. WHY? I DON'T KNOW. I think my final creation came out pretty sweet. In typical Jill-fashion, I cut out text from magazines like a serial stalker to emphasize my message, The Possibilities Are Endless.
Next, I obtained a 12" solid plaster bear to paint. Again... I started cutting out s*** from the anatomy
text again. What's my deal, anyway? I'm noticing that this is a little creepy... yes? Anywho, I started looking for dental terms, and decided to paste them over the left side of the bear... the analytical side. The right side I gussied up in an artsy way. The right holds paint brushes, the left, dental instruments. WOULD YOU LOOK AT THAT IT'S LIKE A SELF PORTRAIT OF ME IN SCHOOL. The picture on the left is before the funk is added. The right... you got it. FUNK. ADDED.

The school still had some plaster bears left over, so I decided to take another one home. It's for scholarships, after all. I just completed it today.... to be honest, I also just started it today. I really couldn't think of anything original to do to be honest. So I thought HEY. Why not paint, you know, a famous painting on it? So I chose Vincent van Gogh's Starry Night. Because it's awesome sauce. I'm pretty proud with how it came out, yes? It's not 100% like the original. You know.. because it's painted on a bear. But hopefully my creations will help someone attend the college in the future!

6.15.2015

tiny reminder, new beginning

It was over a year and a half ago that my beloved bun Moe Skeeto passed away. He was such a great companion, a true little joker and all around funny bunny. For the first few weeks after he passed, I was inconsolable. Every time I went up to the 3rd floor (his gigantic playroom and living area) I felt sad, and I eventually just began avoiding the space. Gradually the feelings of hurt were replaced by happy reminders and fond memories, but it took quite sometime. After my exams were finished in May, I decided to paint a little tribute to him in our garden. There is a large, flat rock surrounded by irises,  and I thought it would be the perfect place to paint his picture. I sketched his image, and used generic acrylics to paint his likeness. It's not perfect, but then again, who or what is? Tiger, our cat, wasn't his best friend, but I knew they had some sort of fuzzy connection. In the nice weather, she goes outside and rests right near his picture. It gives me the fuzzies, too.


In time, the heart can learn to love again. After about a year, I thought about adopting a new little one. After all, everybunny deserves a forever home, right? After school was finally finished, after I finally finished all of my board exams, and after we FINALLY went on vacation! the time was right. I took a trip to the SPCA, and indeed, they had fuzzy ones that needed a home. A small, black female rabbit. No name. Nowhere to go. So I went home, setup her room, went back and brought her home. It was immediately apparent that she was in fact a he. Ms. Toot C. Roll became Mr. Toot C. Roll. He is so different from Moe, yet so the same. It goes without saying that you can never replace a lost love one. But you can learn to love another!

5.22.2015

who wears short-shorts?

The other day after m'board exam I did something rare. I WENT TO THE MALL! I'm not a huge mall person, but I really needed some summer shorts. The only ones I have are exercise shorts, or khakis, like Jake from State Farm. Anywho, I found a couple pairs but they were expensive! (NOTE: My current idea of expensive is $15.00... you know why? It would take me 2 HOURS of tutoring to earn a pair of shorts. Sad. ) So no, I did not buy them. But I decided to look up some patterns at home so I could sew some of my own! There's nothing like having a TON of time on your hands!
I came across this FANTASTIC BLOG called Melly Sews with the EASIEST patten for shorts. If you're looking for a fun project, sign up for her weekly newsletter, and she'll email you a link to print out the pattern. Not only that pattern, but all of her others, too! Sew simple! <---- sorry, a little sewing humor.

I downloaded the pattern, cut it out (one for the front, one for the back) and looked through my crazy collection of fabric and decided to make 6 new pairs for myself. That's right. Go big, or go home, right? Seeing that I'm already at home, it kinda contradicts itself.

Anywho, visit Melly's page for instructions... It wouldn't be nice of me to copy and paste instructions because simply, I didn't create it. Just a little reminder if you're sewing clothing: REINFORCE THOSE SEEMS PEOPLE. It takes an extra minute, but it's always worth it. The last thing you wanna do is jump around screaming yee-haw while your hoo-hah makes a break for it.

I always leave a 1" seam, and stitch over it twice. Then, I'll fold in the excess fabric, and stitch over that: This keeps the seam clean and free of frays. And remember: If you're making something, even if it's for yourself, put a tag in it! You don't want to end up like I did when someone ripped off my art as their own. This is an AWESOME project and it is simple, simple! Get this: Each pair of shorts, including the cost of fabric and elastic for the waistband.... COST ME A FRIGGIN' $1.99. WIN!!!


5.20.2015

past project: bathroom remodel!

So there was one glorious week during the 2014-2015 winter break where I decided that it would be a GREAT idea to remodel our en-suite bathroom. This decision was based solely on my inability to stay still, and my lack of something constructive to do... or to study. So I figured I'd show you my little (HUGE) project so that you may too, redo your bathroom if you feel crazy inspired enough to do it!

DAY1
Step 1: Make a list of everything that you need from the hardware store. This won't stop you from having to go back a second, third and fourth time, though.
Step 2: Using a chisel and hammer, rip the foe-black marble tile off of the wall and wonder why someone put it on the wall sporadically in the first place.
Step 3: Drain the ol' toilet, disassemble and store it in the tub whilst you work. Put a rag in the hole, so no sewer gas comes'a wafting in! While your at it, take out the medicine cabinet, too. It sucks.
Step 4: Using a crowbar and hammer, rip up the old cracked tile flooring.
Step 5: Don't lay down on the couch, because if you do...
Step 6: You'll have to take a fist-full of ibuprofen because you now you can't get up. Sad.
 

DAY2
Step 6: Repair the walls! Joint compound, joint tape, lots of drying time, and elbow grease to sand it down smooth. A small mouse sander helps.
Step 7: Prime the walls. You forgot to buy primer, so check the basement. Look! You have grey primer! Let's use that and pretend like it was your plan!
Step 8: Then apply 2 coats of the paint color of your choice. Take another fist full of ibuprofen before you go to sleep.
Step 9: Realize that the medicine cabinet you threw out... they don't sell that size in the stores anymore. Custom purchase it and blow your budget! Cry a little.  


DAY3
Step 10: Ask your Dad for help.
Step 11: Rewire the electrical sockets. Be sure to SHUT THE BREAKERS OFF. (Twice now we thought they were off and then POP!)
Step 12: Along with him, cut all of the 9x12" tiles to size, mix the mortar and lay the tiles.


DAY4: 
Step 13: Grout the tiles. This is pretty much all you can do since you can't step on the floor, so...
Step 14: HAVE A BEER.

DAY5: 
Step 15: Reinstall the toilet with all new inner workings. Man, that's a nice flush.
Step 16: You know all that leftover glass tile you had from your kitchen? Why not make a back splash in the bathroom?
Step 17: Regret this decision, you just made more work for yourself.

DAY6: 
Step 18: Install that new custom medicine cabinet, and hope that it holds f***ing gold from the trouble you went through to find it.
Step 19: Make some minor adjustments to the decor, after all, why not have stuff look niiiiiiice?
Step 20: Marvel at your work and vow never to do it again, until, that is, you do it again.

5.18.2015

over-over-overdue

Like the title says, over-over-overdue!

I'm taking my national board exams tomorrow. I already completed 4 of them (clinical exam, jurisprudence, local anesthesia and CDCA/NERB). Once I complete tomorrows 350 question grueling exam, I will be OFFICIALLY DONE with my understudies to become a dental hygienist. After that, alls I need is a license to practice! Which means...


I SHALL RETURN VALIANTLY TO THE WORLD OF ARTS, CRAFTS, FREE-TIME AND GENERAL RELAXATION! HUZZAH!

LOOK! Here I am contemplating things! Like, what kind of art project will I start on Wednesday? Do these glasses magically transport me to 1980 when I'm asleep? And, if I hold this pose long enough, will people think that I'm actually contemplating something?

9.18.2014

the spirit.

Time is going by too quickly if you ask me. I tried desperately to go to sleep early tonight since I've been feeling under the weather for about... oh 3 weeks (COUGH!) and a thousand thoughts were going through my mind, mostly all related to fun dental things. Did I sort through all of my papers for my rotation tomorrow? did I finish all of my journal entries? do I have all of my things in the car that I need for tomorrow? should I have stayed up later to study? will I remember everything from oral path today? can I make it through another week of clinic with another 5 quizzes next week plus tutoring others? and so on... and so on... and so on... 

I have been so wrapped up lately in everything surrounding school and attempting to excel in the field, that I've completely neglected my life. I've neglected friends. (Sorry friends, I promise to be fun again.) I've neglected my fun little art blog. And I've neglected writing. (HA. I should clarify, I've neglected writing about art, I've written TONS of papers, some of which were friggin' unnecessary to write.) Needless to say, I kinda lost the spirit. My spirit. That made me sad.

So instead of going to bed depressed, I decided to get up and write a little damnit. And craft a little, damnit! Because why not? As much as I love school right now, I need to distance myself both mentally and physically. So I'm going to aim to make one night a week my craft night.

Tonight's project? 
Modifying a glitter painting I did a while back with a cast of my teeth from Perio Lab.  OK. I said I would try to distance myself. I'M TRYING, OK?! Back off mang. It's a work in progress. I'm not sure where it's going, but it's better than going nowhere.


In the meantime, enjoy this note from my dad to the tooth fairy from when I was a kid. I'm not sure which tooth was my lucky tooth. We may never know.


2.14.2014

exciting news time!

Back in June of 2013, I sent The Gallery Collection an original watercolor of mine to be in the running to win a $10,000 scholarship in their 7th Annual Create-A-Greeting-Card contest. 

AND GUESS WHAT?
 
 I'M ONE OF THE 203 FINALISTS!!! 

Check it out HERE on their website, I am beyond so THRILLED!!!

UPDATE! I DIDN'T WIN AT ALL AND WAS TERRIBLY DISAPPOINTMENT FOR APPROX. ONE DAY. 

1.10.2014

working for the janey company

Over the past few weeks and/or months (who knows because time has been flying!) I've been working for my dear friend Avi who recently created The JANEY Company. I've been a maker for sure! In general, I sew together Avi's designs and creations, and my time off from school has been allowing me to make more than usual! I just finished 16 of them: 14 adult ones, and two kids ones. I think they came out pretty darn snazzy! It's been an awesome learning experience, as it keeps evolving from batch-to-batch! Head over to the website to check out the beautiful hand-crafted hooded scarves made from gently loved sweaters. You can also head over to the Etsy shop to check out items that are for sale! I'm proud to be a part of a locally sustainable company, and I'm hoping that in the future, I can continue to be a maker for the JANEY company!

Photo is courtesy of The JANEY Company. I made this one!

10.25.2013

spooky skeleton: college work

So in my absence of actually creating works of art, I decided to donate some of the things that I did as anatomical studies in college. The first college. You remember, the sculpture, the sewing....? The stained glass? ...No? Well, it's been awhile since I've posted, so I don't blame you for forgetting.

I might try to post a past project about once a week since well... you know... I don't have much time for anything else but fulcruming, rock n' rolling and probing. Now that I write that out, I realize that you probably have no idea what I'm talking about. Ah, the Dental Hygiene life.


I think I did this skull back in... 2004? So almost a good 10 years ago. It's literally been sitting in my parents basement since then, freaking them out on occasion when they need to go get a gravy boat or a Christmas wreath, then BAM! There's a skull IN YO' FACE. I had almost completely forgotten about it, until one day I was thinking... WAIT A DANG SECOND. I need to know all of these muscles allllllll over again, just like I needed to know before... so why not pass along the skull so people can study from it? So it's going to my Dental Anatomy teacher in the hopes that people get a kick out of it. It's not going with the glasses though. Those are mine. 

did I accidentally sculpt duck face?


9.17.2013

IT HAS BEEN THREE MONTHS.

3 MONTHS SINCE I POSTED LAST. That's just downright sad. Between the four summer session classes that I took between May and August, preparing for Dental Hygiene school, actually being in Dental Hygiene school, and trying to maintain a somewhat normal sense of communication with family and friends, it didn't really leave me time for much more. Except for eating and sleeping. And those two things I'll NEVER give up. HA! I'm working on two small (SMALL) projects right now for a friend that I think I'll barely be able to finish by the deadline. And by barely, it means stay up the night before until I finish it all. And I can't post pictures, since it's kinda-sorta a surprise.

I ended up sending off the resin cast of my hand to the company who was going investigate making custom fitted nitrile gloves. I haven't heard a word from them since I sent it in June. Not a "we got it!" or a "YEP!" or a "NOPE!" when it comes to actually making it. Oh well. I tried, right? So far, I can manage with the XS gloves on my left hand just fine. It just takes me an hour to put the glove on.

As for art... how's about practicing with my dental instruments every night? NOW THAT'S ART. My gosh, I never realized the precision involved with instrumentation! It's a thing of beauty. But hey, if I trained my hands to sculpt, I can train them to un-sculpt some calculus from teeth.

That's all for now. No pictures to post. No thrilling stories of crafting. Maybe someday soon, I promise. I'll be sure to keep my camera handy when I pull the all-nighter at the end of the month. 


6.10.2013

still not done?

It has been one week and I STILL have not completed the second part of that mold. WHAT'S THE HOLDUP JILL? I wish I had a good excuse, other than everything else going on. Maybe I can squeeze in some time tonight to work on it.

6.05.2013

MOTHER mold

I worked hard to get the first part of the plaster mother mold finished on Monday night. I built up a bed  underneath my rubber mold so I could work on it horizontally instead of vertically. I WISH I DID THIS IN COLLEGE. Because it was so much f***ing easier to do than working on it vertically! I built up cut walls that extended about... oh, one inch or so from the edge of rubber mold, and made a running key. (This will ensure that the second part of the plaster mold will align and lock into the first part. HUZZAH!) I mixed by first batch of plaster and applied the first "splash" coat: It's just a super even, thorough coat of plaster. Once it hardened, I started making my hemp birds-nests.

You're probably like... dafuq? Check it. I mixed up my second batch of plaster, dipped one of these 'birds-nests' into the plaster, then applied it to the mold. This will give the mold a bit more girth and strength. I actually had to mix up a third batch because the birds-nests soaked up so much moisture from the plaster!
top, l: plastalina cut walls w/keys. top, r: plaster mold setting. bottom, l: side one, finished! bottom, r: another view!
After about an hour, I stood the mold up, got rid of the plastalina cut walls, and cleaned up the edges of the plaster mold.

Yesterday, I was going to do the second half of the mold, but I was working on homework, then ate steak and lost all of my ability to function like a human being. Tonight, I need to make sure to apply A LOT of coats of Muphy's Oil Soap to the edge of the existing plaster mold before I start the second part. This will put a barrier in between the two parts of the mold, and they won't stick together.

VERY. IMPORTANT. STEP.

Then, I'll throw on the second part of the mold and be done! With the mold that is. I still need to cast in resin. I'm hoping to do that one of these nights.

So little time.

6.03.2013

rubber molds in the summer heat

So I really didn't document the first part of my mold making process, mostly due to the fact that I had one hand sunk in dental grade alginate. It's hard to maneuver a camera when you have a box attached to you. Ha! That sentence sounded horrible.

But I'm so glad I wrote that entry, because luckily, my college studio-mate pointed out that rubber was a suitable mold to cast resin in, not plaster. So it was back to the drawing board! I had to revise my two-part plaster mold into a two-part rubber mold. Slightly more complicated, but hey... I love mold making, so the challenge was accepted.

So back to Blick I went on Friday, and picked up Smooth-On Rebound 25 rubber and plastalina . But before I could strap on my gloves and mix the rubber, I had to do a little thinking... was I going to just paint the rubber on when the plaster hand was free standing? Or should I work a little more on my prep and make a pour-able mold? The pour-able mold won out by a landslide. Yes, it's a ton more prep-work and there is a slight risk that your mold will bust a leak and rubber will go spewing out all over the place... but the results and the stability of the mold would be worth it. What can I say. I'm a rebel risk taker. Not.

the mold, plastalina and aluminum with keys
On Saturday, I built up a bed of plastalina (it's an oil based clay that doesn't dry or shrink) to rest the hand on in a horizontal position. The one benefit of working with plastalina on a 90+ degree day is that it gets super pliable and soft with the heat. Then I used some aluminum flashing to make a quick and easy flex mold. It's so much easier than cutting and clamping wood together, fo realz. I used the plastalina to fill in the gaps, and to mask the bottom 50% of the plaster hand. Then, I pressed a couple marbles into the clay, and made some indentations to make keys. Keys are super important, because they will ensure that the mold aligns properly when you're ready to cast. Sounds easy, but that prep work literally took me five hours.
I sprayed the mold quickly with Ease Release so that the rubber wouldn't adhere to the plaster hand. Then it was all measuing, mixing and pouring from there! The Rebound 25 is a great 1A:1B ratio, so it takes the guesswork out of measuring. The first part of the mold came out better than I expected, so Saturday was a win in my book!
pour #1 after it had set for 12 hrs. ready to de-mold!
top left: before removing plastalina. top right: after. bottom: rubber with keys clearly a success!
On Sunday, I completed the second pour of rubber. I basically did the same steps all over again... built up a bed of plastalina, secured the aluminum flex mold, mix, pour, wait. When the rubber had set, I stood the hand/rubber mold up. I noticed that all of the plaster on the base of the hand wasn't covered, so I decided to mix a small batch of rubber and cover it up. Totally worth it in my books. I'll add some pics of that with my next post.

Today I'm hoping to make the first 1/2 of the plaster mother mold. Wish me luck!

5.18.2013

my first real craft show!

I had a great time at my first real craft show! I brought along 40 wine bags, 4 tie-purses, some poof ball flowers and vases that I made for the wedding, and two small paintings which you might remember: abcdef fail and anxiety.

A lot of people made me feel so great: Compliments on how clever my ideas really made me smile. It was wonderful to hear people admiring my sewing and my bags. AAAAAAAAND (drum-roll PLZ....) I SOLD 4 BAGS! I'm so glad I made more bags and spent time preparing as much as I could. I did learn a couple of things from my craft show experience.
  • I need sign. I picked up foam-core to make one the other night, and I decided that it wouldn't look professional enough, so I didn't bother making one. I need to make one like I made for Bamboula. One that says something like CRAFTS MADE FROM TIES! or CREATIONS FROM TIES! or something like that.
  • I wonder if I'm not being confident enough. I was so happy to talk to visitors at the table, that I didn't really "sell myself" like other people were. Is that a key to success?
  • It would have been nice to have someone there for a couple minutes so I could have left to use the bathroom, or to walk around to see other peoples things. At one point, I had to pee so bad that I left a note that said BE BACK IN A MINUTE! and asked the couple next to me if they wouldn't mind keeping an eye out for me. 
All in all it was a great day for a great cause. I hope I can do more fairs in the future, and maybe with some luck, I can have some more success!